Grafting techniques for Bonsai
Grafting techniques for Bonsai
In Japanese: “Tsugiki” – in grafting you “meld” a stump (the root system and a small portion of the trunk) and a graft (the upper portion of the trunk, including branches) together.
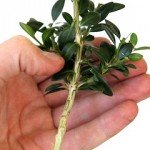
This technique is often used to combine strengths of two different plants together in one new plant. For Bonsai, grafting is used for a variety of purposes: to add roots to enhance the Nebari (root flare or surface roots), to add a “missing” branch to a tree or to cultivate a new tree. Grafting can be tricky, so start experimenting on inexpensive material to gain experience first
When?
Pines should be grafted in the winter,
Junipers and most deciduous trees in the spring or summer.
How to graft a Bonsai tree?
Grafting will only work when the stump and the graft belong to the same botanical family.
Two techniques are commonly used for Bonsai purposes;
- Side-grafting (to add a branch or root to an existing tree)
- Top-grafting (to merge a stump and a graft together to form a new tree).
Side grafting
- First step is to find a suitable graft to add to the tree; you might take a graft from another tree or you can use material from the tree itself (basically relocating a branch or root). The graft should not be too large, about 2’’ (5 cm) is enough (see photo 1, below).

- Make a shallow incision in the bark of the stump (using a sharp, flat knife) of about 0.4’’ (1 cm) long. Be careful not to cut into the hardwood of the tree (see photo 2, below)
- Now take the graft and cut the last 0.4’’ (1 cm) at an angle, to make it fit properly into the incision of the stump. Next place the graft with the barkless portion facing the interior of the tree into the stump, making sure the cambial layers of both the graft and the stump contact. Use wire or an elastic material to wrap the stump and the graft tightly together (see photo 3, below)
- It will take about two months before the graft will show signs of growth, however, do not remove the wire that holds the stump and the graft together for at least a year to make sure they bond properly.
Top grafting
- Take a stump of at least 5 mm thick and cut it straight off at about 4’’ (10 cm) height (see photo 1, below). The graft should be thinner than the stump and around 2’’ (5 cm) long (see photo 1, above).

- Using a sharp knife, make a vertical incision (of about 1’’ (2 cm) long) into the stump, splitting it just outside the middle (see photo 2, below).
- Next, take the graft and cut the last 1’’ (2 cm) at an angle. Insert it into the stump with the bark-less side of the graft pointing towards the middle of the stump; make sure the cambial layers contact (see photo 3, below).

- Use wire or an elastic material to wrap the stump and the graft tightly together.
- After about a year the graft should start growing; howeverdo not remove the wire that holds the stump and the graft together for another year. The point at which the graft is inserted into the stump will be clearly thicker than the rest of the trunk, although this will slightly decrease over the years. If it is low enough, you will in the future be able to bury it below soil level.


